In order to create digital printing and later custom print files in up to SRA3 format, the following example is based on Adobe Illustrator.
Preparation in Illustrator
Design, registration numbers and each tool line must be drawn in the correspondingly named layer.
- Artwork includes design
- Register includes registration numbers
- Tool layers Thru-cut
Used tool layers:
- Kiss-cut – sticker surface cutting
- V-cut – V cut on boards
- Thru-cut – cutting through
- Route – milling
- Grease – creasing
The diameter of the registration marks are 6–8 mm without sidelines, fill colour is black.
It is important that the Register layer is the uppermost, prior to the tool layers.
Registration marks may be positioned asymmetrically around the detail. The registration marks may not touch painted surfaces or lines. It is recommended that three or more marks are used.

After loading, the output consists of two different files:
- Print file PDF X1a standard.
The file contains the design to be printed along with registration marks. Tool lines not to be added.
- Cutting file PDF file, which preserves the layers. The file contains tool lines along with registration marks. Printed surface not to be added.
We recommend that the Transform command be used for loading.
Loading of a large format poster and board print files in the machine
It is not necessary to add cutting marks for loading in our printing and cutting programme, the printer’s software will add them itself.
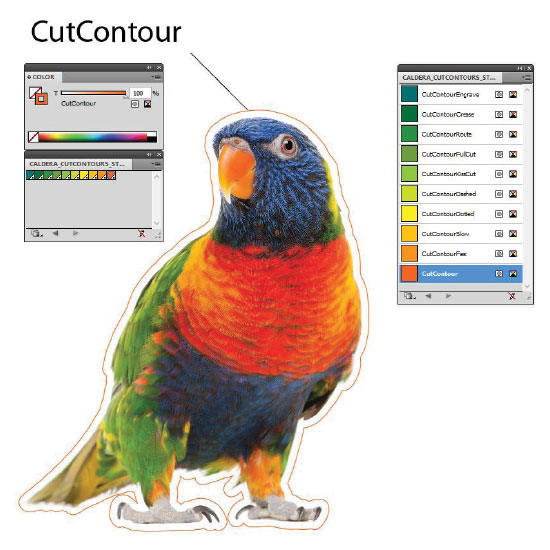
A description of the tools with different Pantone Spot colours must be provided in the print file.
When milling, lines must be characterised with separate colours, with cutting to take place either on the inside or outside of the line.
Designations of tools must begin with the phrase CutContour, with the following work describing the work or cutting, which is to be done with that line.
*In case the downloading does not work, right-click on the button and choose “Save as..”
Unzip the .zip file. To add the color palette to Illustrator: open the in Swatches panel options > Open Swatch Library > Other Library… > choose the newly downloaded palette cut_contour.ase from your computer.
- Thru-cut – through cutting
- Kiss-cut – sticker surface cutting
- Route – milling
- V-cut – V cut on tiles
- Grease – creasing
